I am sharing below what I found helpful for setting up a very basic Unity Scene that will allow for locomotion (snap turns) and teleportation – developed on macOS with an Oculus Quest 2.
I hope your find it helpful.
Unity VR beginner set up
Note : For this project I am using v2020.3.34f1 LTS
If you are ready to jump directly into Unity, I would suggest downloading the VR Room test scene as a good starting place, as it has all of the packages you will need already included (some need to be activated)
Note: Unity is updated regularly so you may need to swap out game objects if they are updated (ie. XR Rig in the tutorial has become XR Origin, see below)
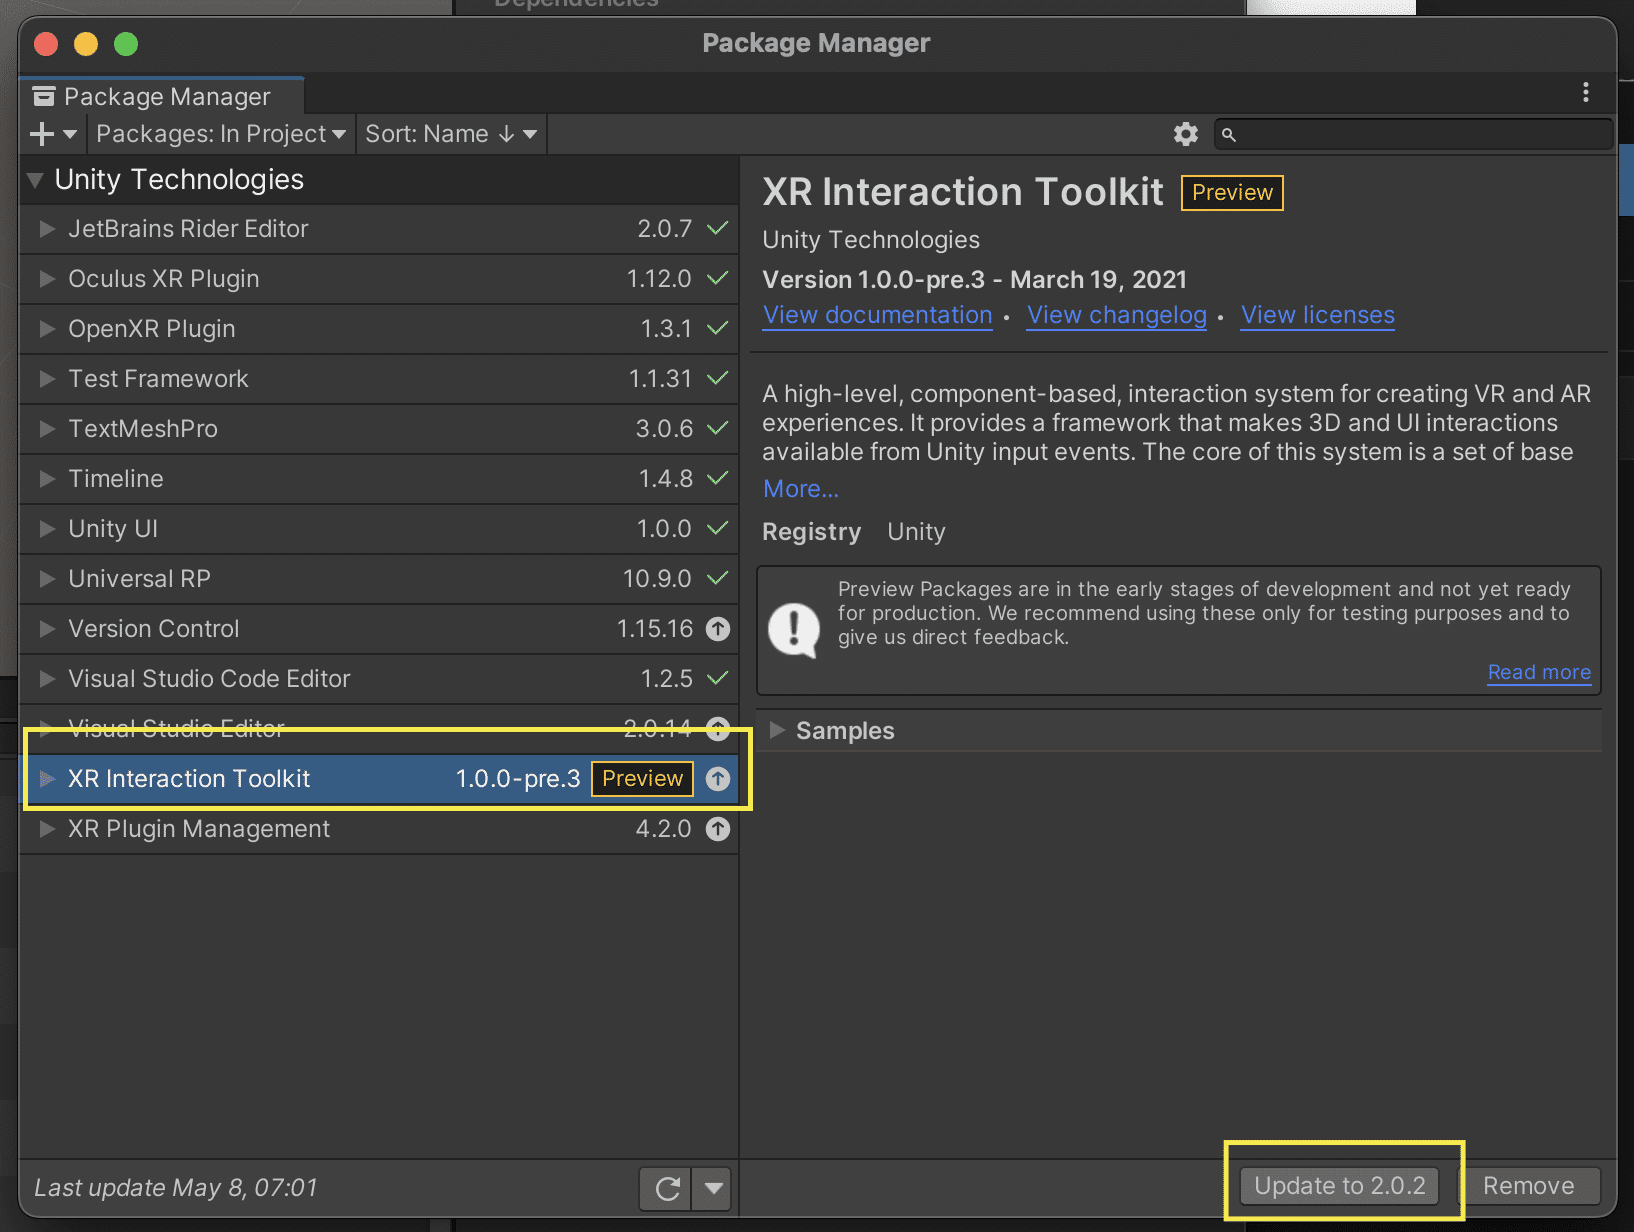
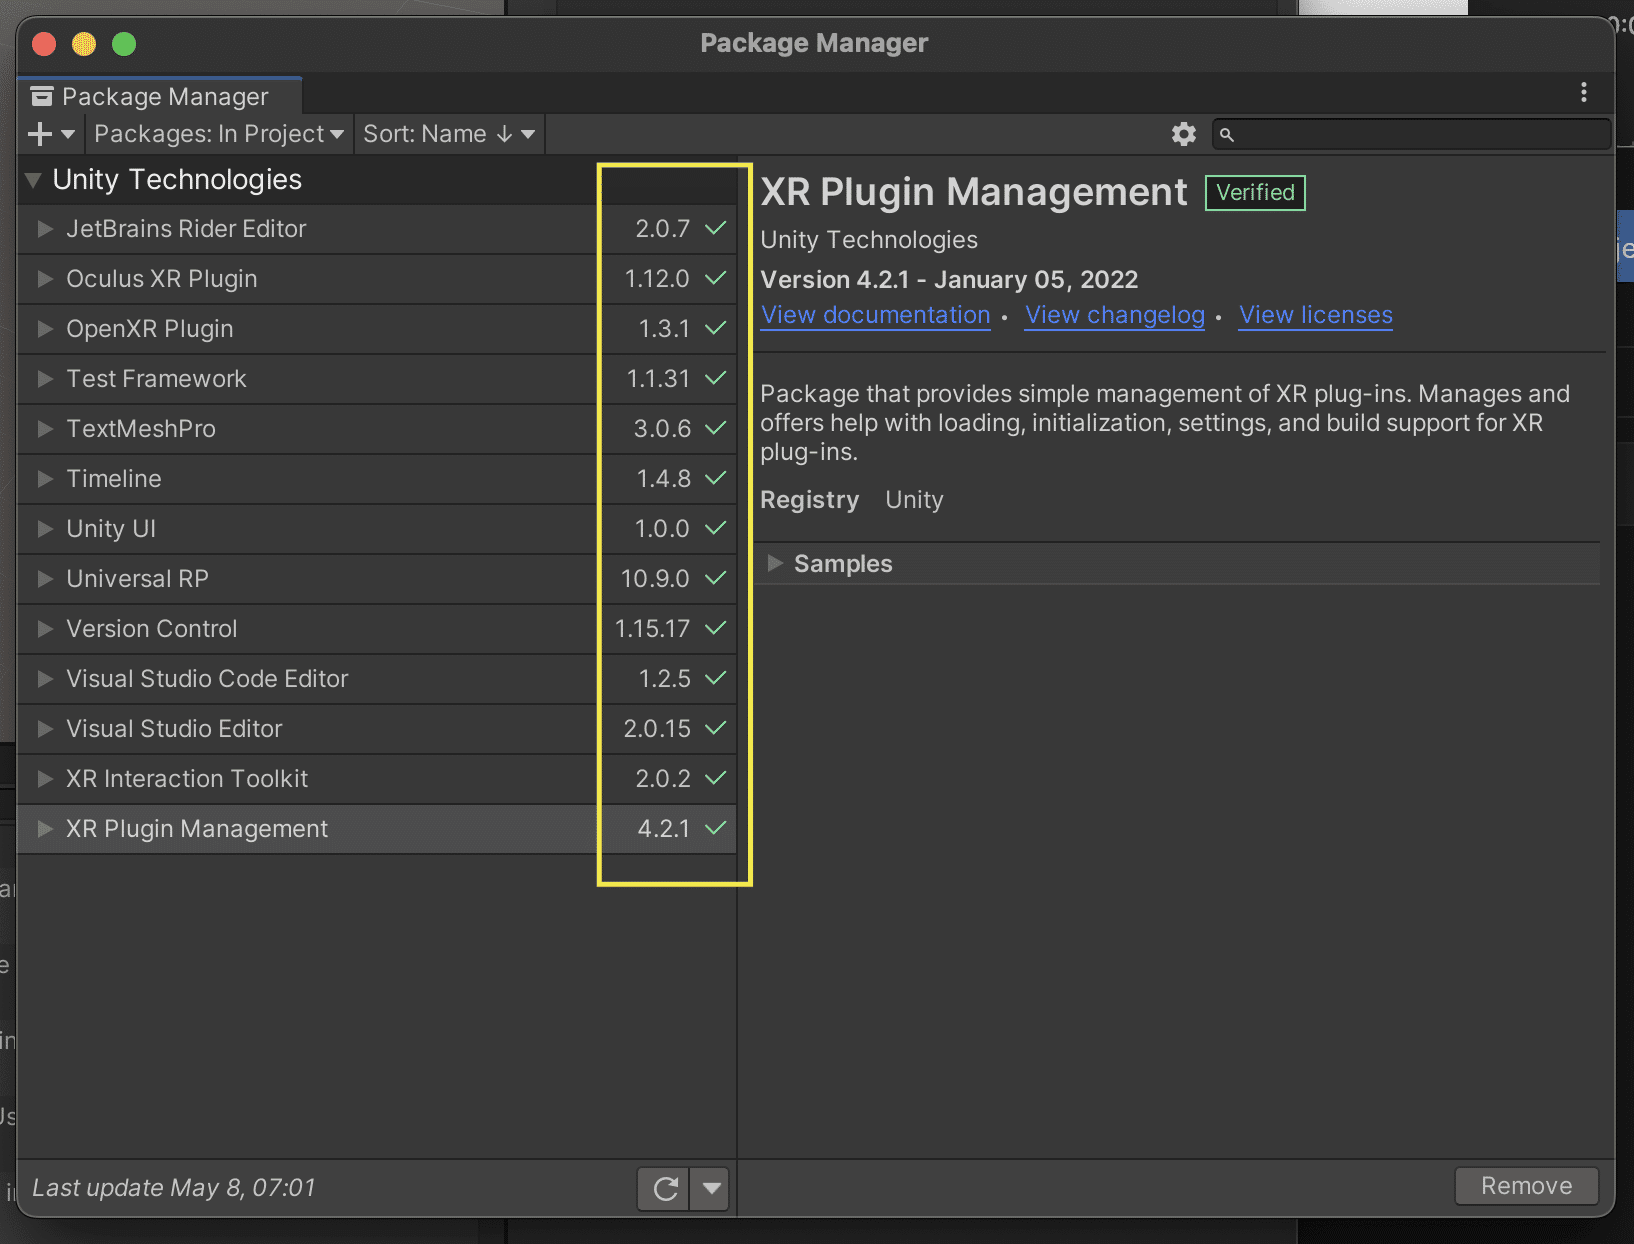
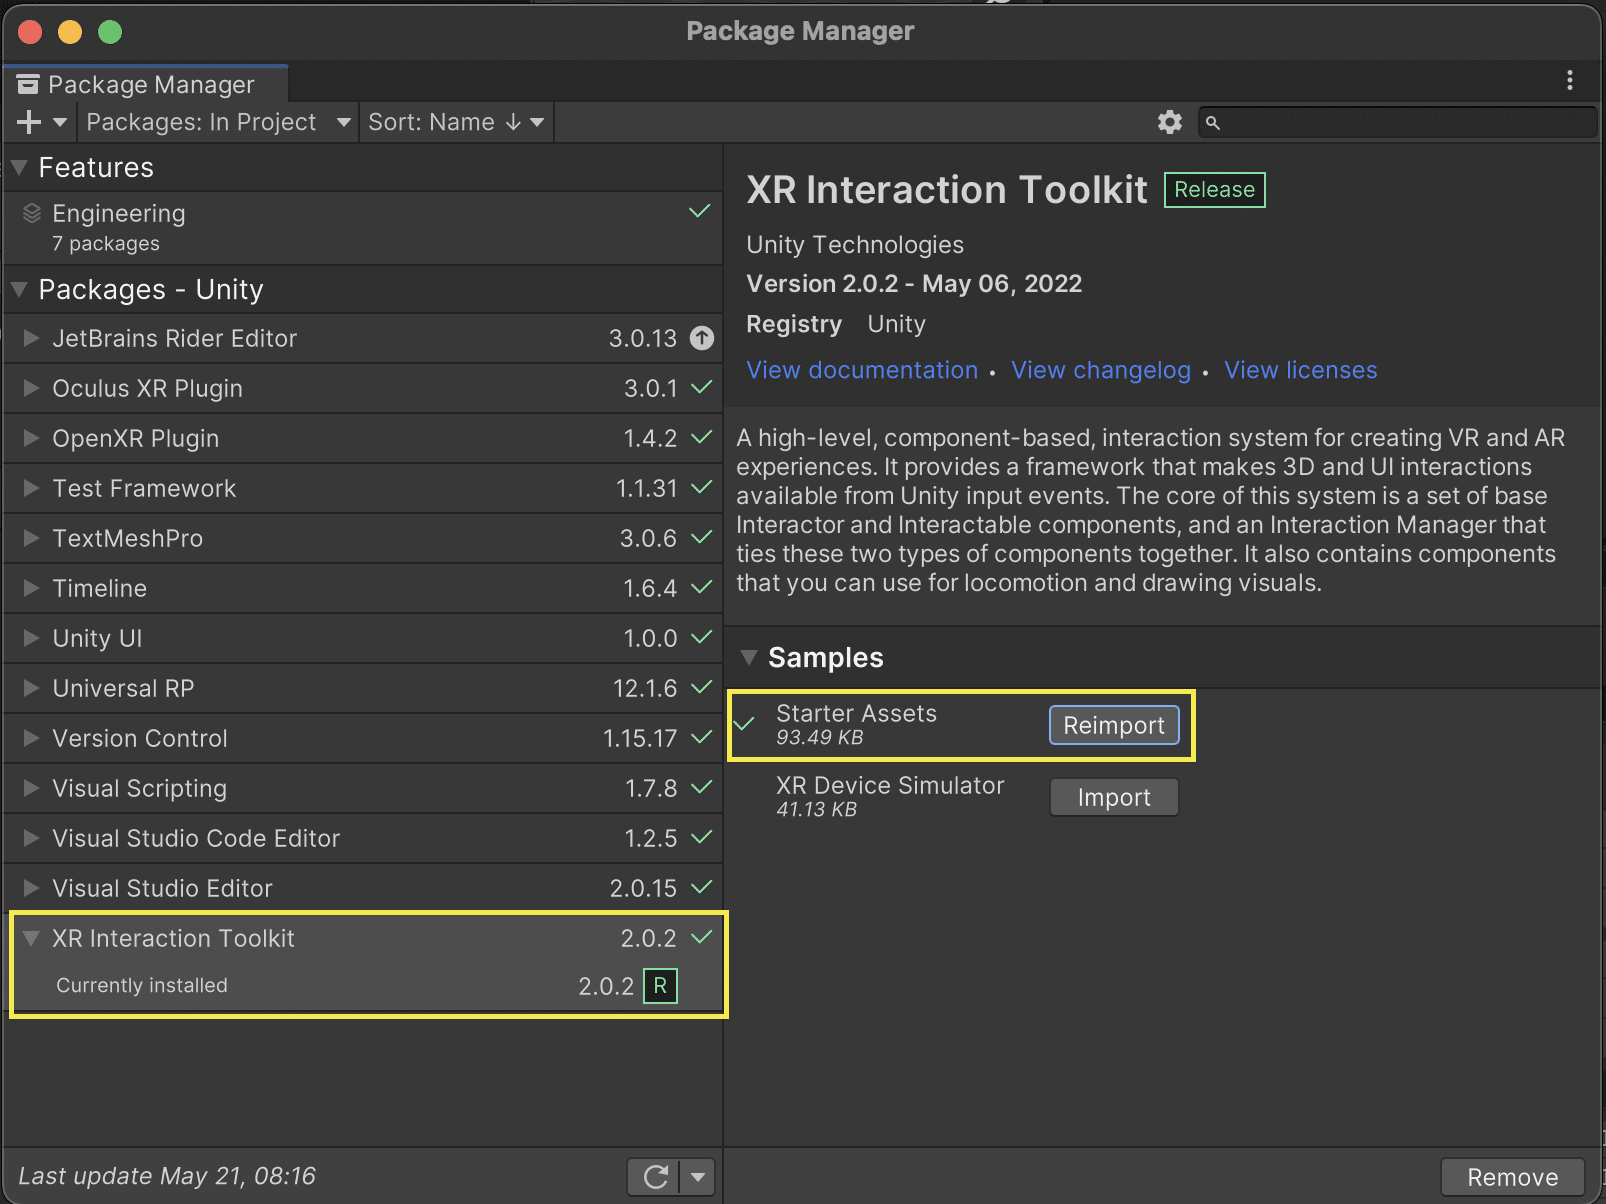
Updating Packages
The starter project calls for Unity 2020.3.1f1 and I am using v2020.3.34f1 so I need to update the packages (Window > Package Manager)
For all of the Packages: In Project without a green check mark (update)
For all of the Packages: In Project without a green check mark (update)
Unity has a good tutorial here on all of the steps, if you need a video walk thru.
Set up VR Locomotion
Next we are going to enable Snap Turns and Teleporting.
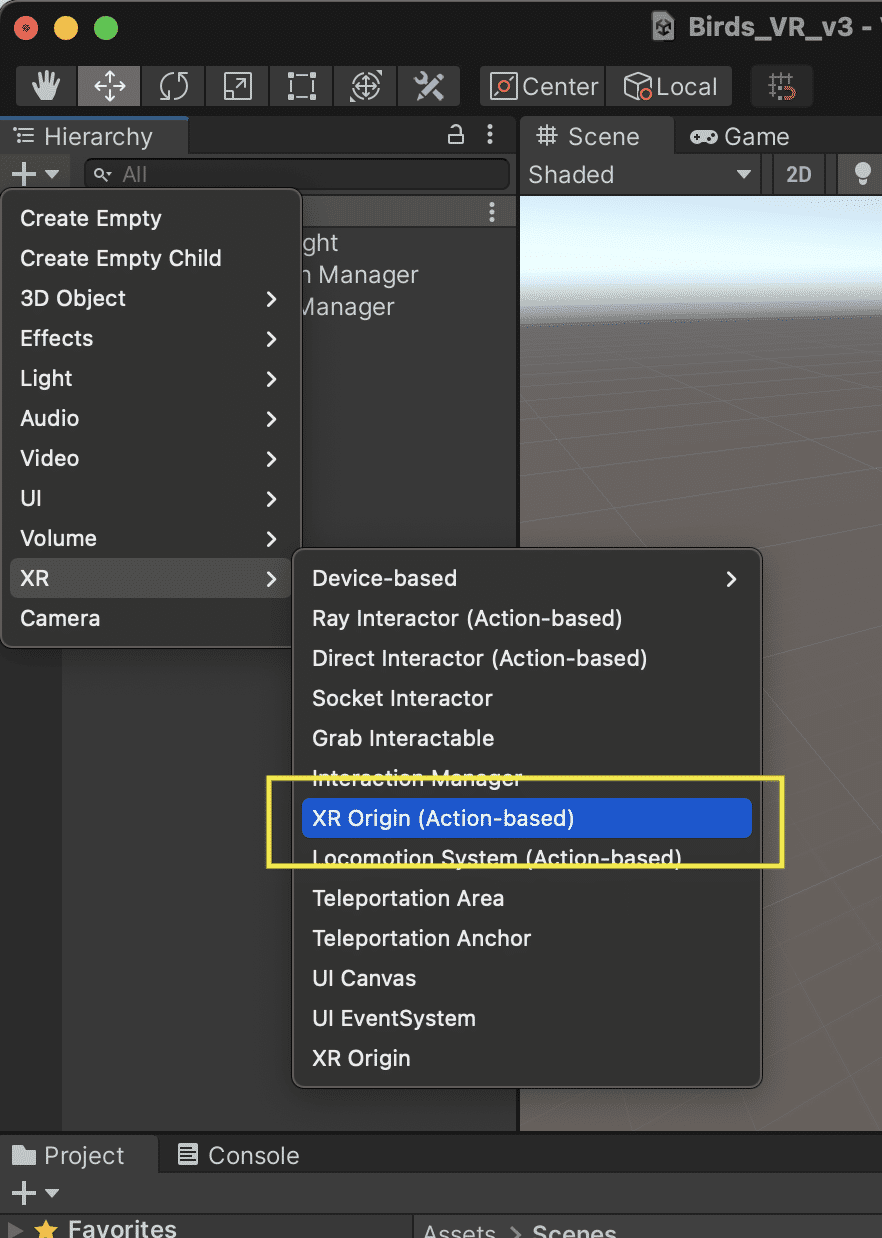
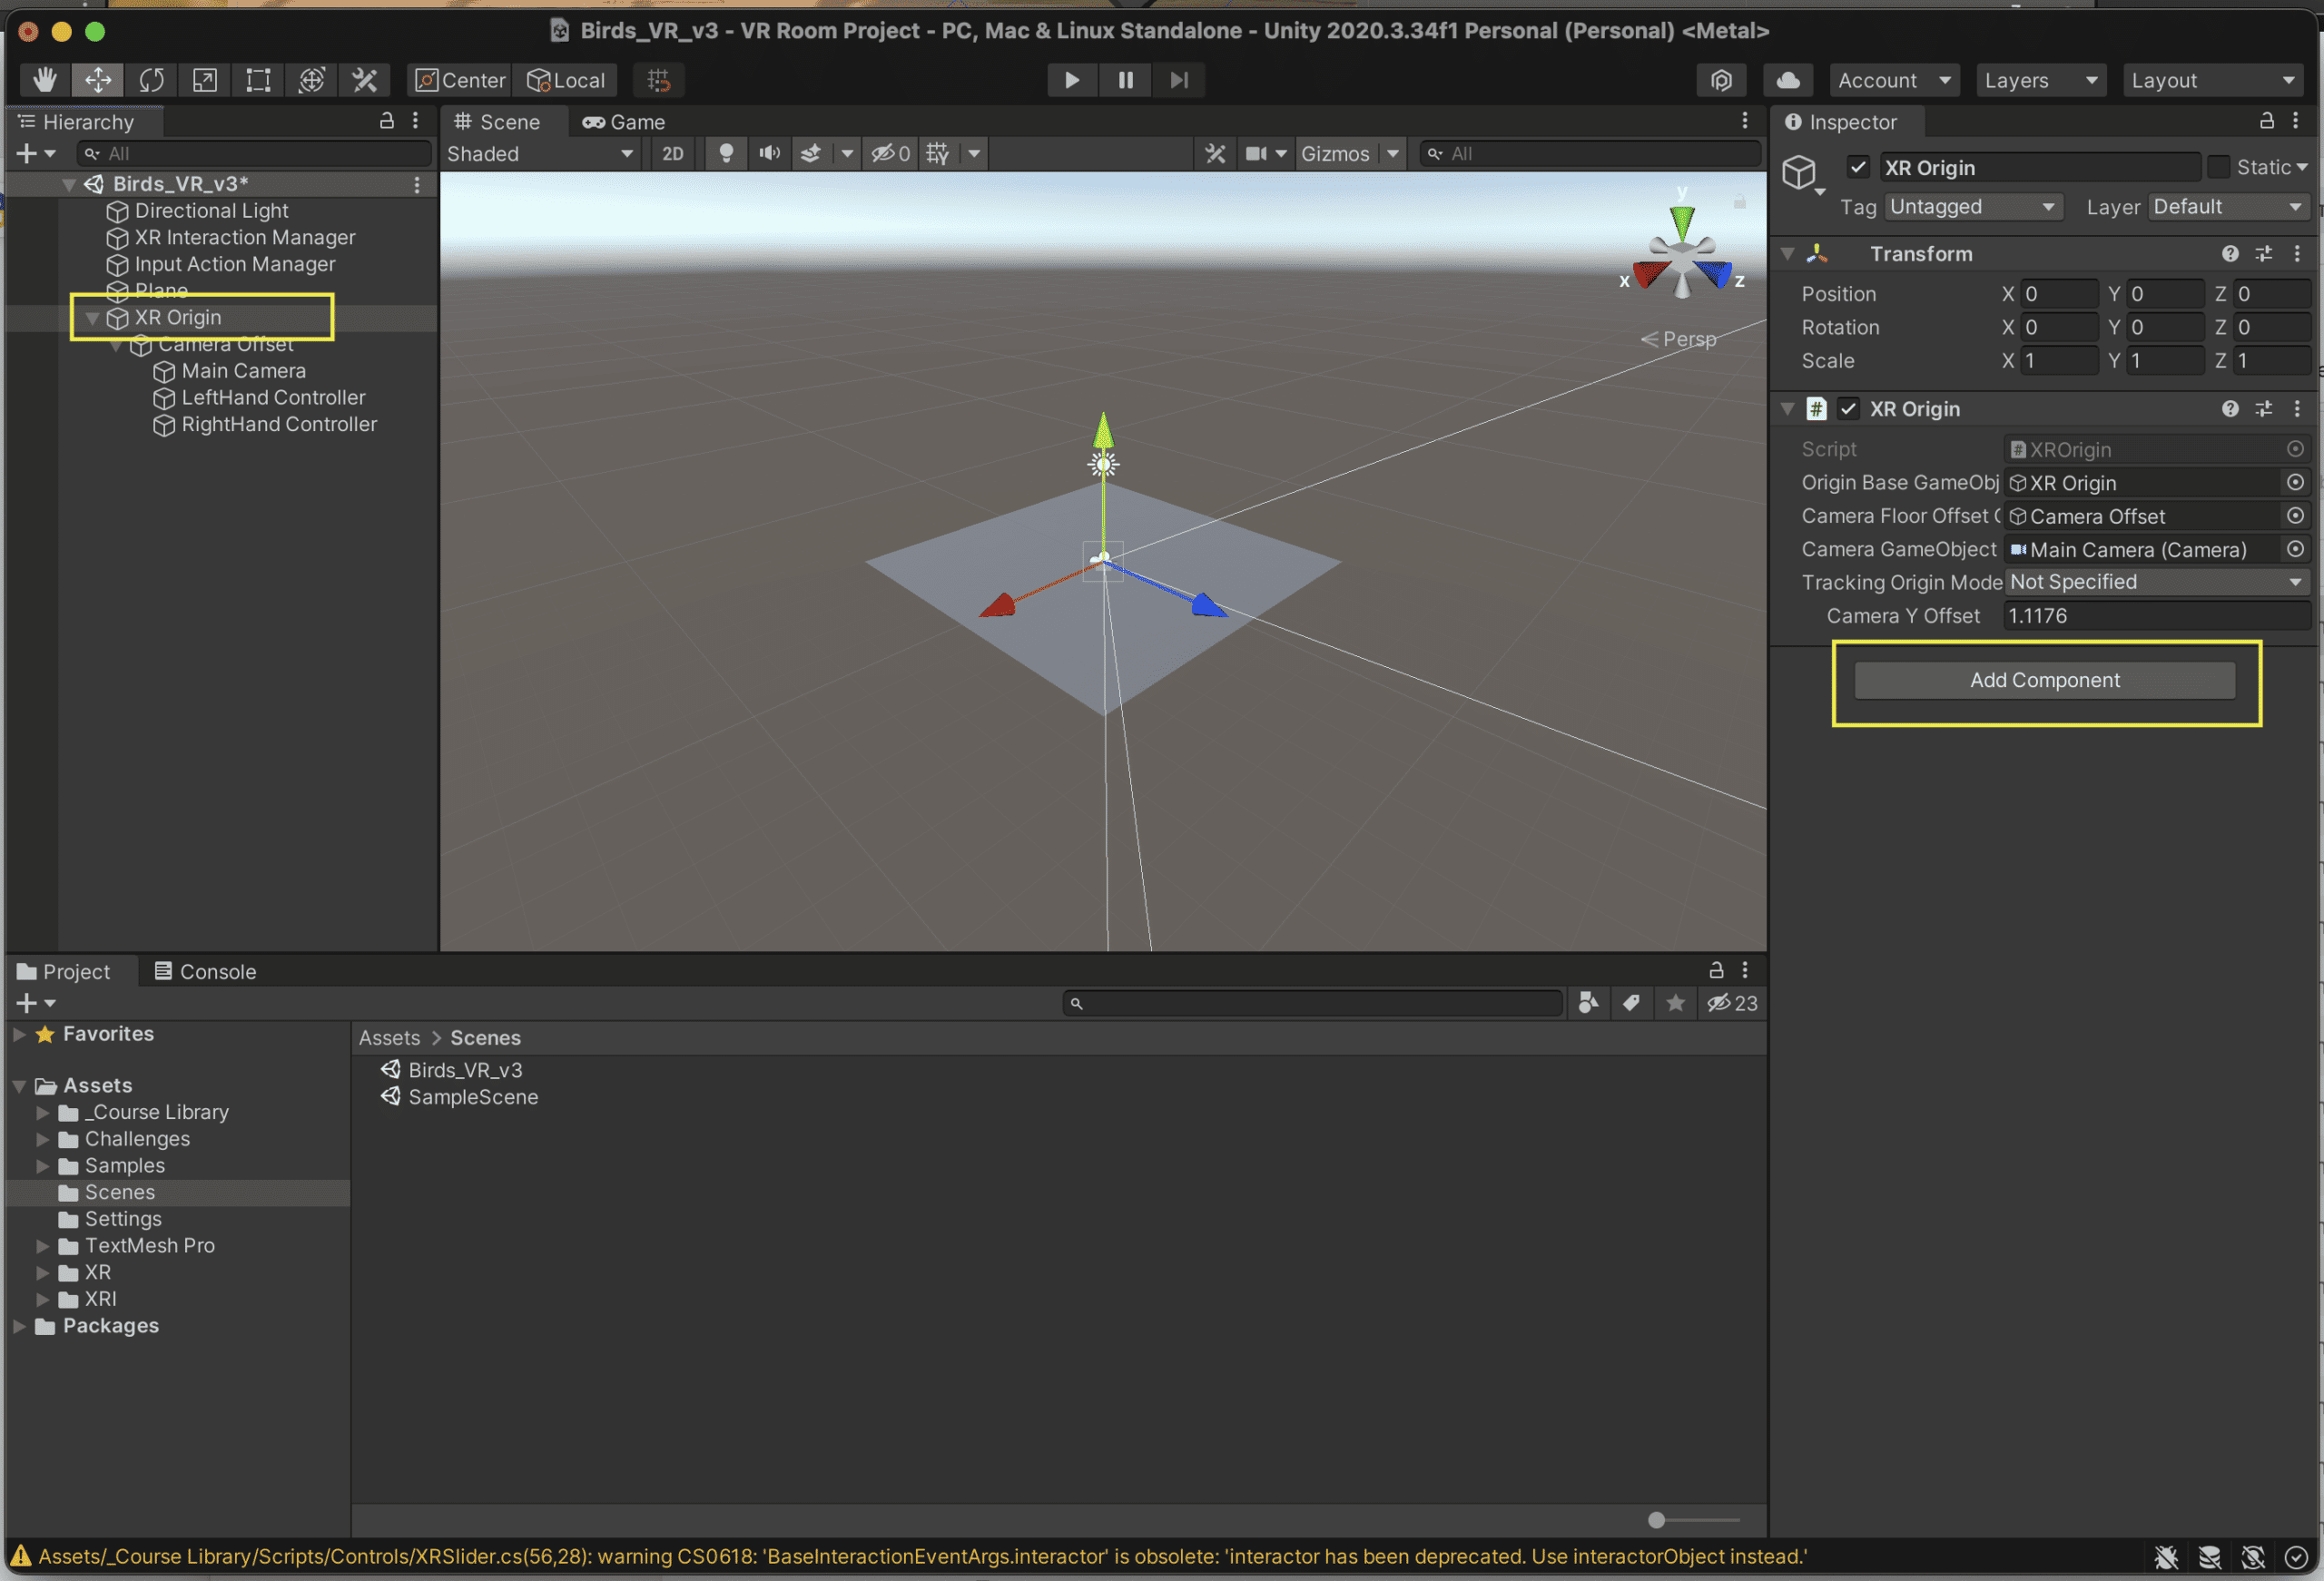
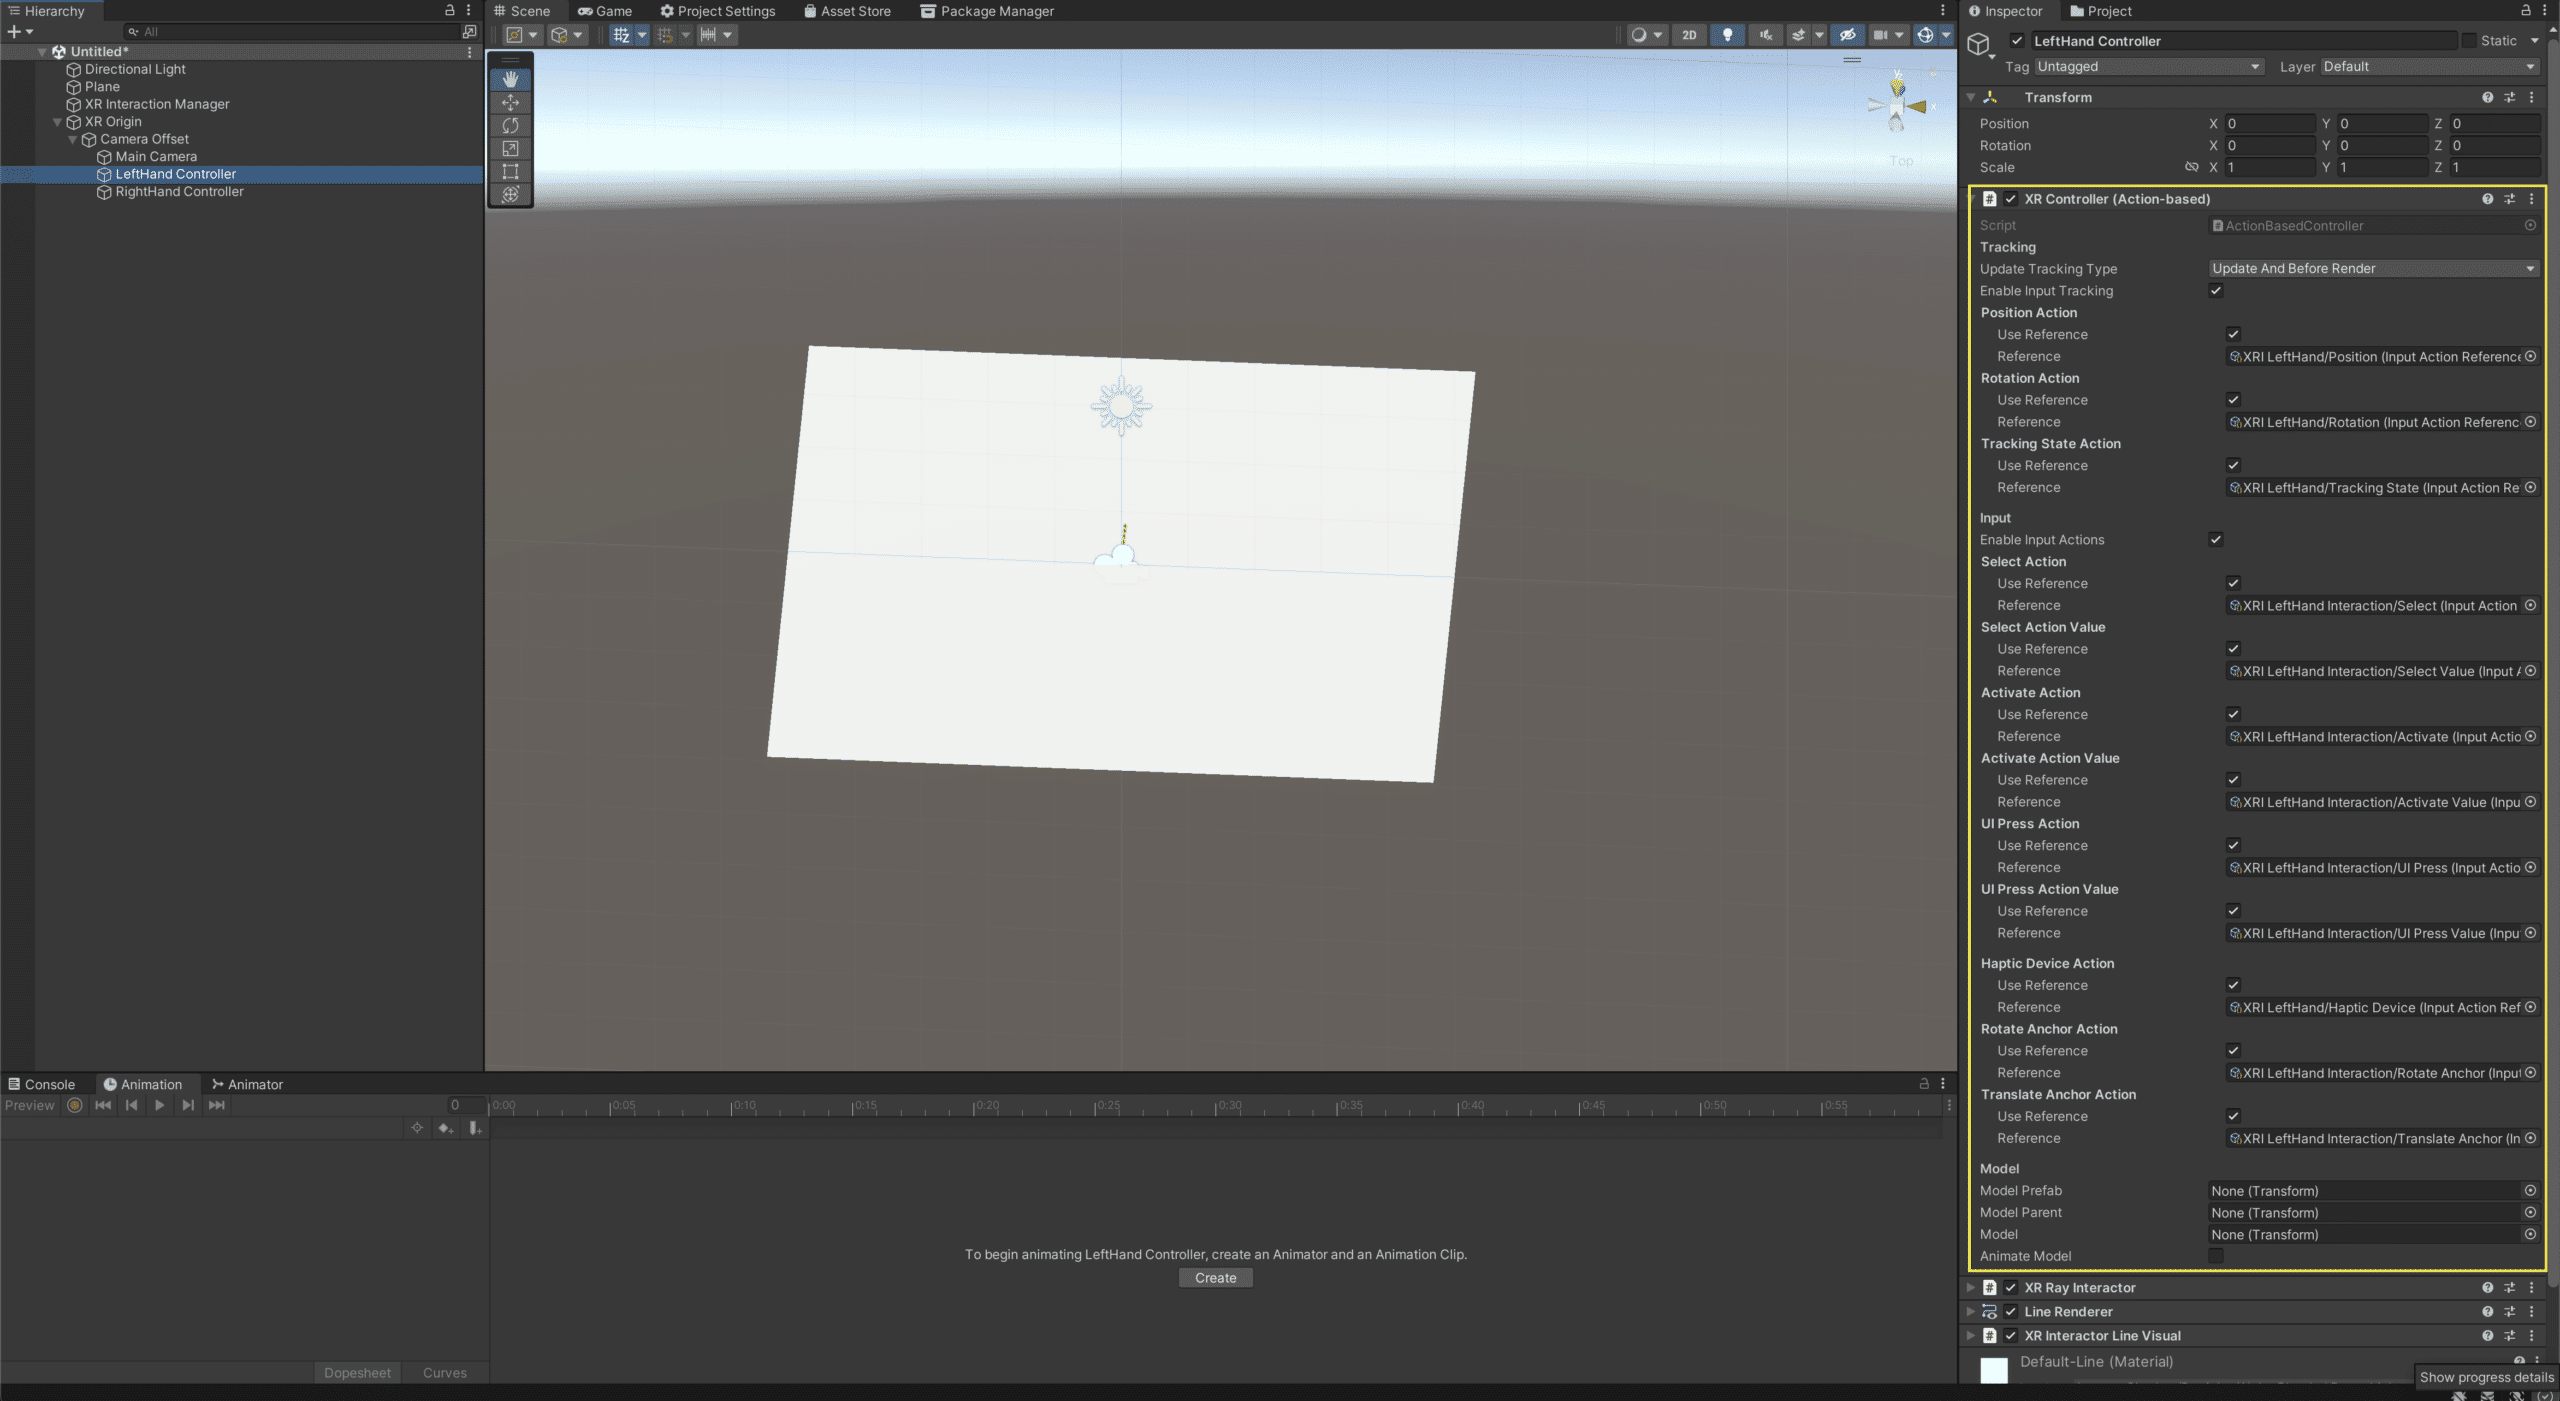
With the new scene open, find and select XR Rig from the Hierarchy panel. Delete it.
You will need to add the new Game Object “XR Origin” ….. this replaces the depreciated XR Rig.
Then in the Inspector Panel, ‘Add Component’ “Locomotion System” …. this will allow us to use the controllers to turn.
Make sure to add ‘XR Origin(XR Origin) to the Locomotion System (see screenshot below) …. this sets the Game Object that is holding the camera to be able to move.
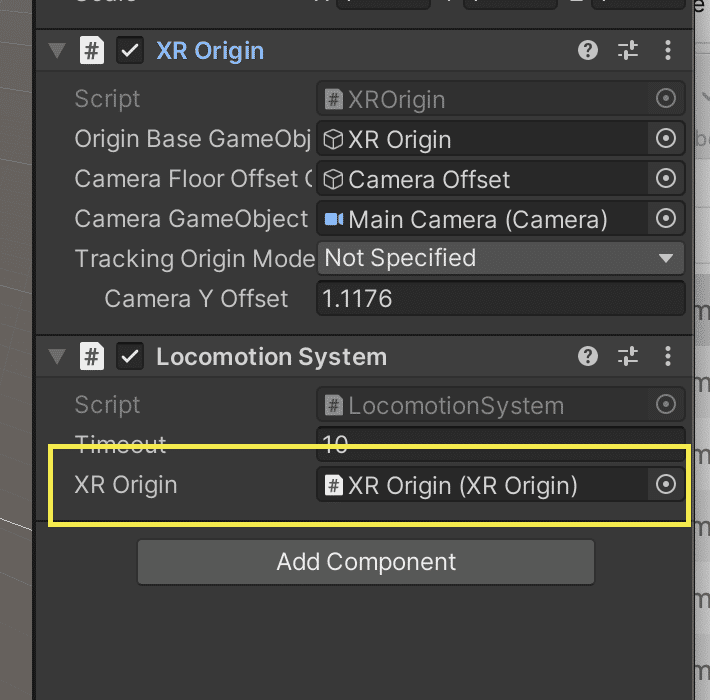
Next we are going to add “Snap Turn” (because it causes less motion sickness than continuous turn).
Make sure to add the Locomotion System to the Snap Turn Provider (Action-based)
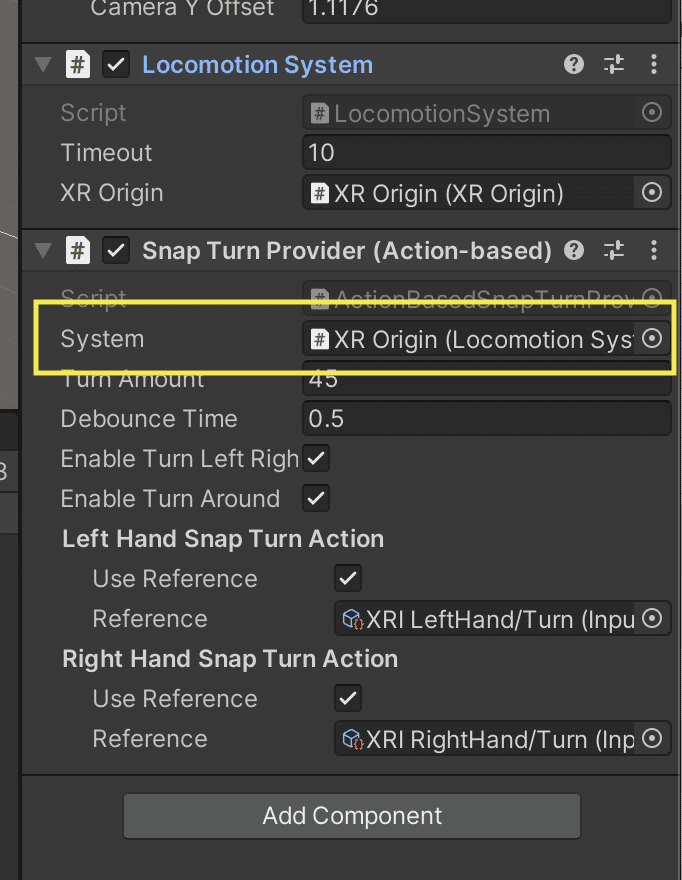
VR Teleportation set up
Add “Teleportation Provider” to XR Origin
Set Locomotion System for Teleportation Provider
Add game objects and some teleportation areas
I added very basic game objects so we can test to make sure our scene allows us to Snap Turn and Teleport
The white cylinders will be used as our teleportation targets
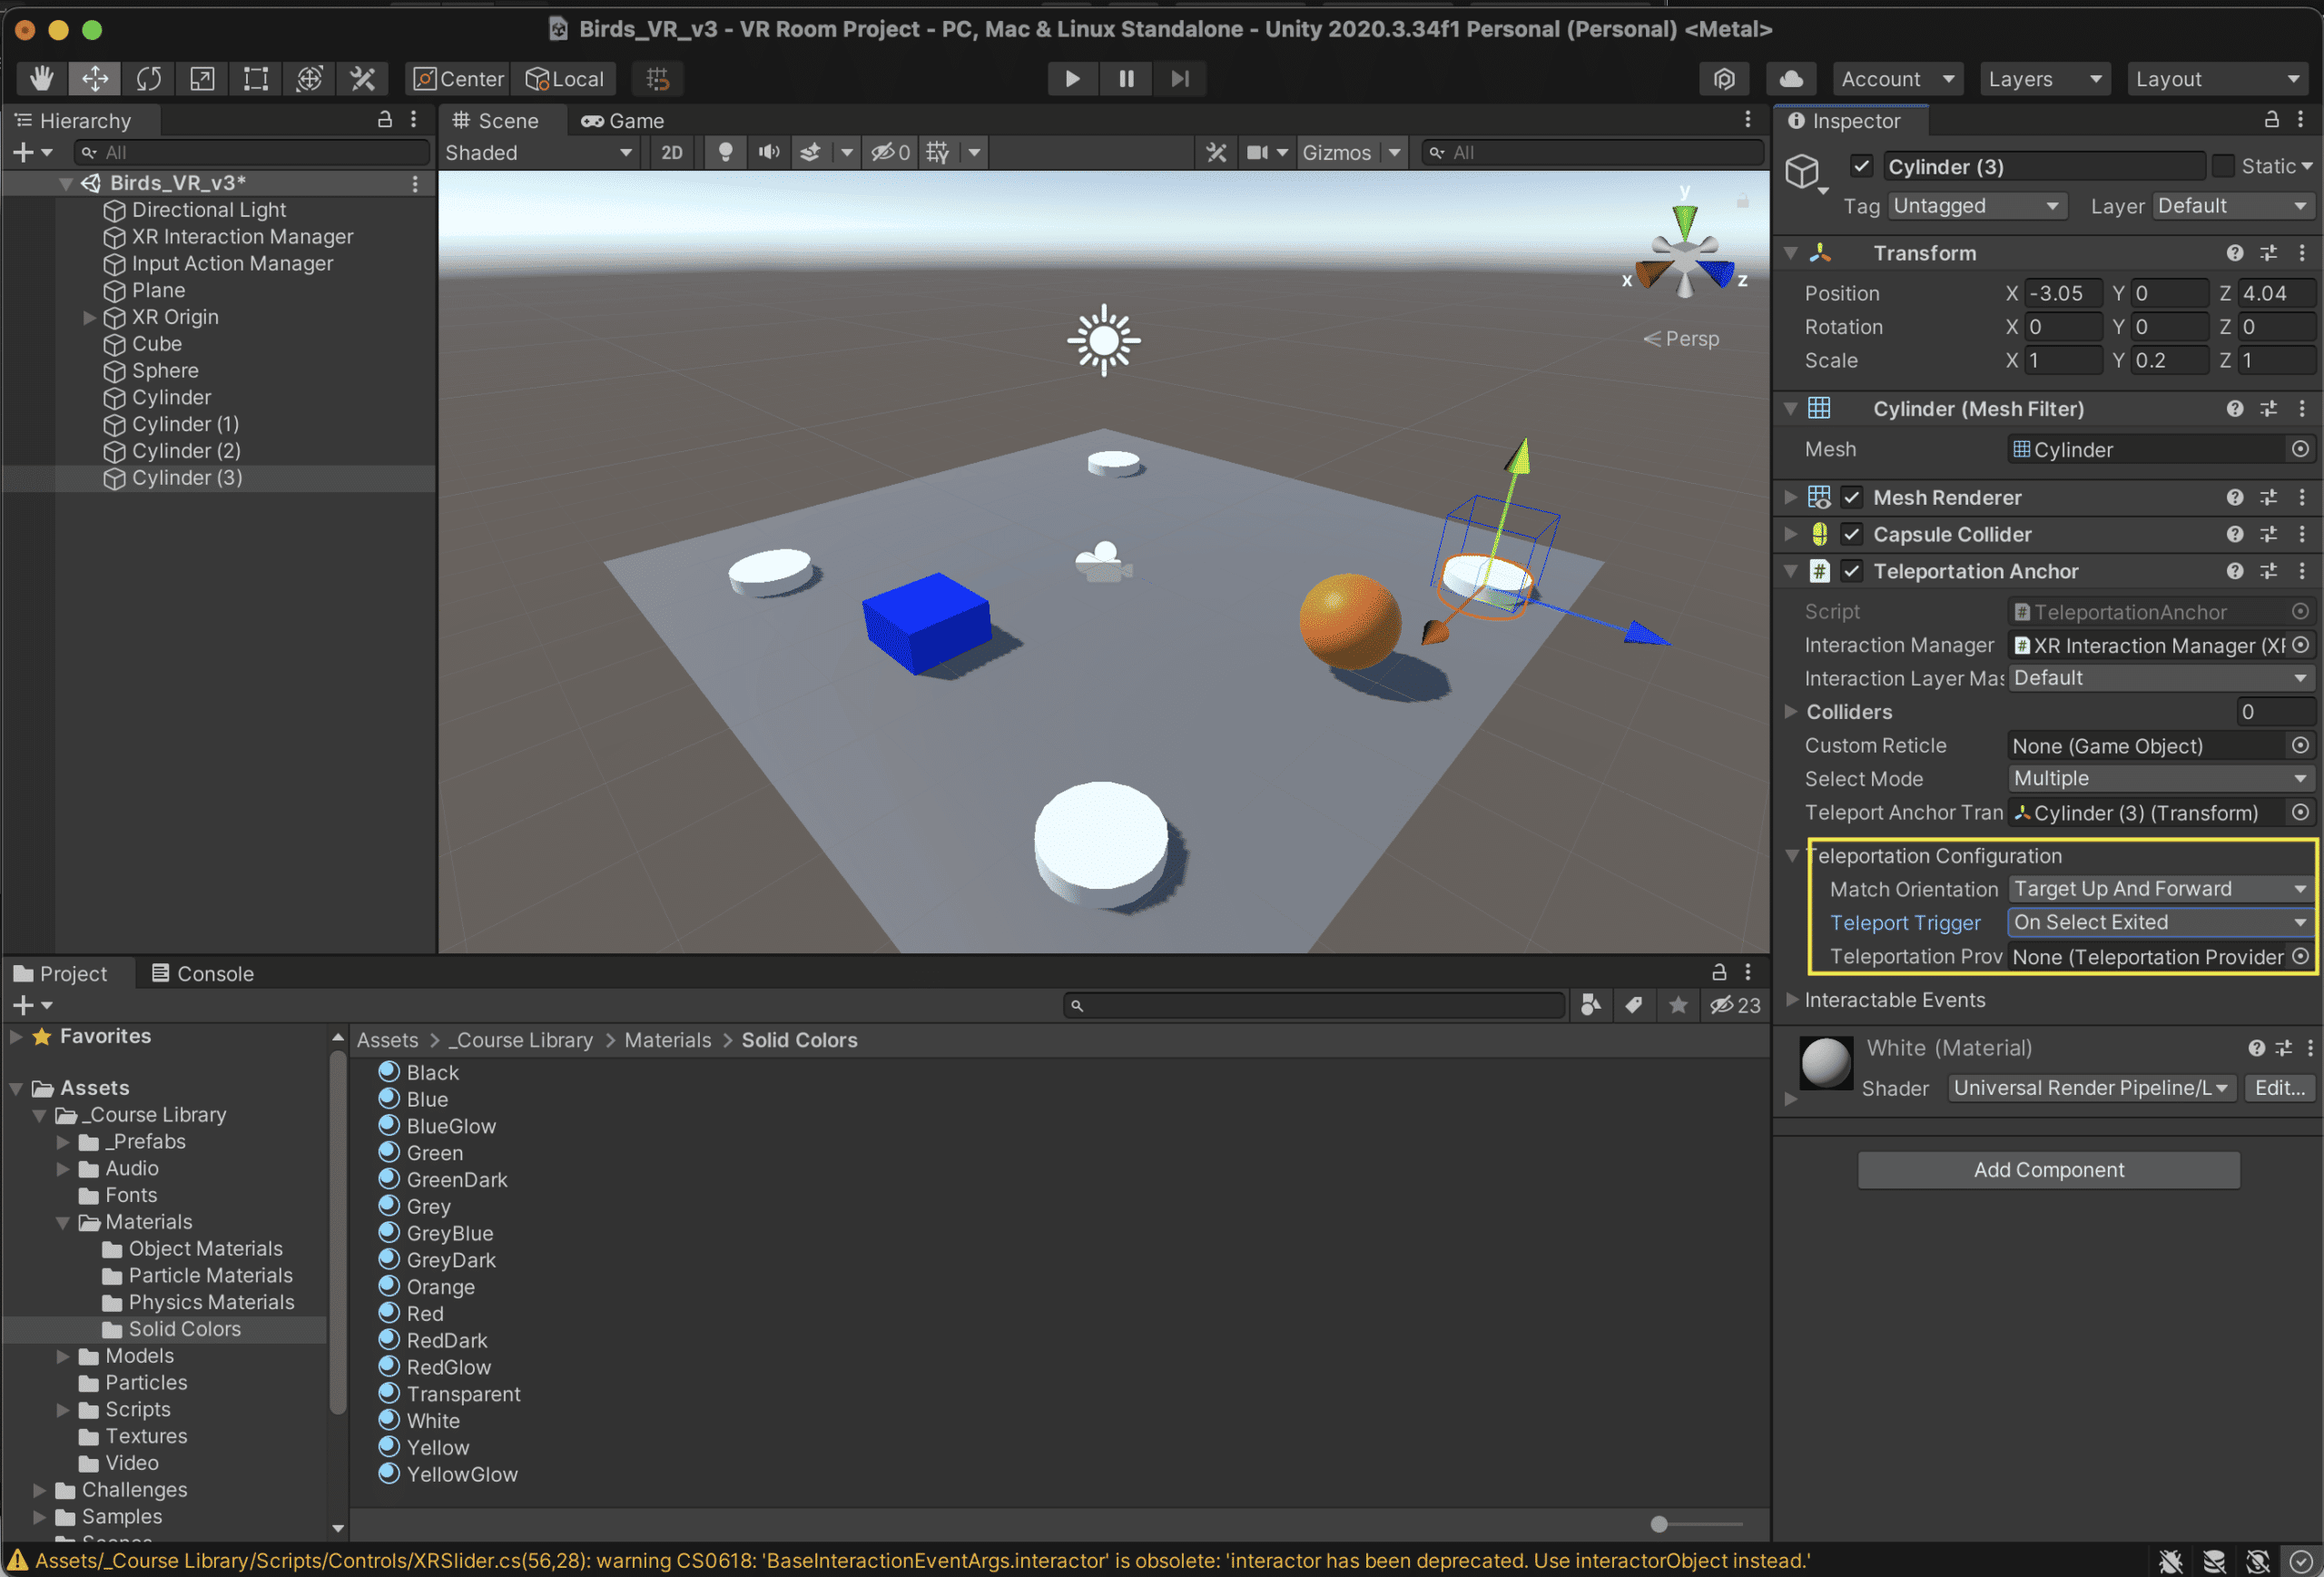
Select one of the cylinders and Add Component “Teleportation Anchor”
Make sure to add the Teleportation Anchor to all Game Objects you want to move between …. I did the 4 white cylinders.
When you test the scene in your Oculus Quest 2 you should be able to select the Teleportation Anchors and move between them.
Testing our Locomotion and Teleportation
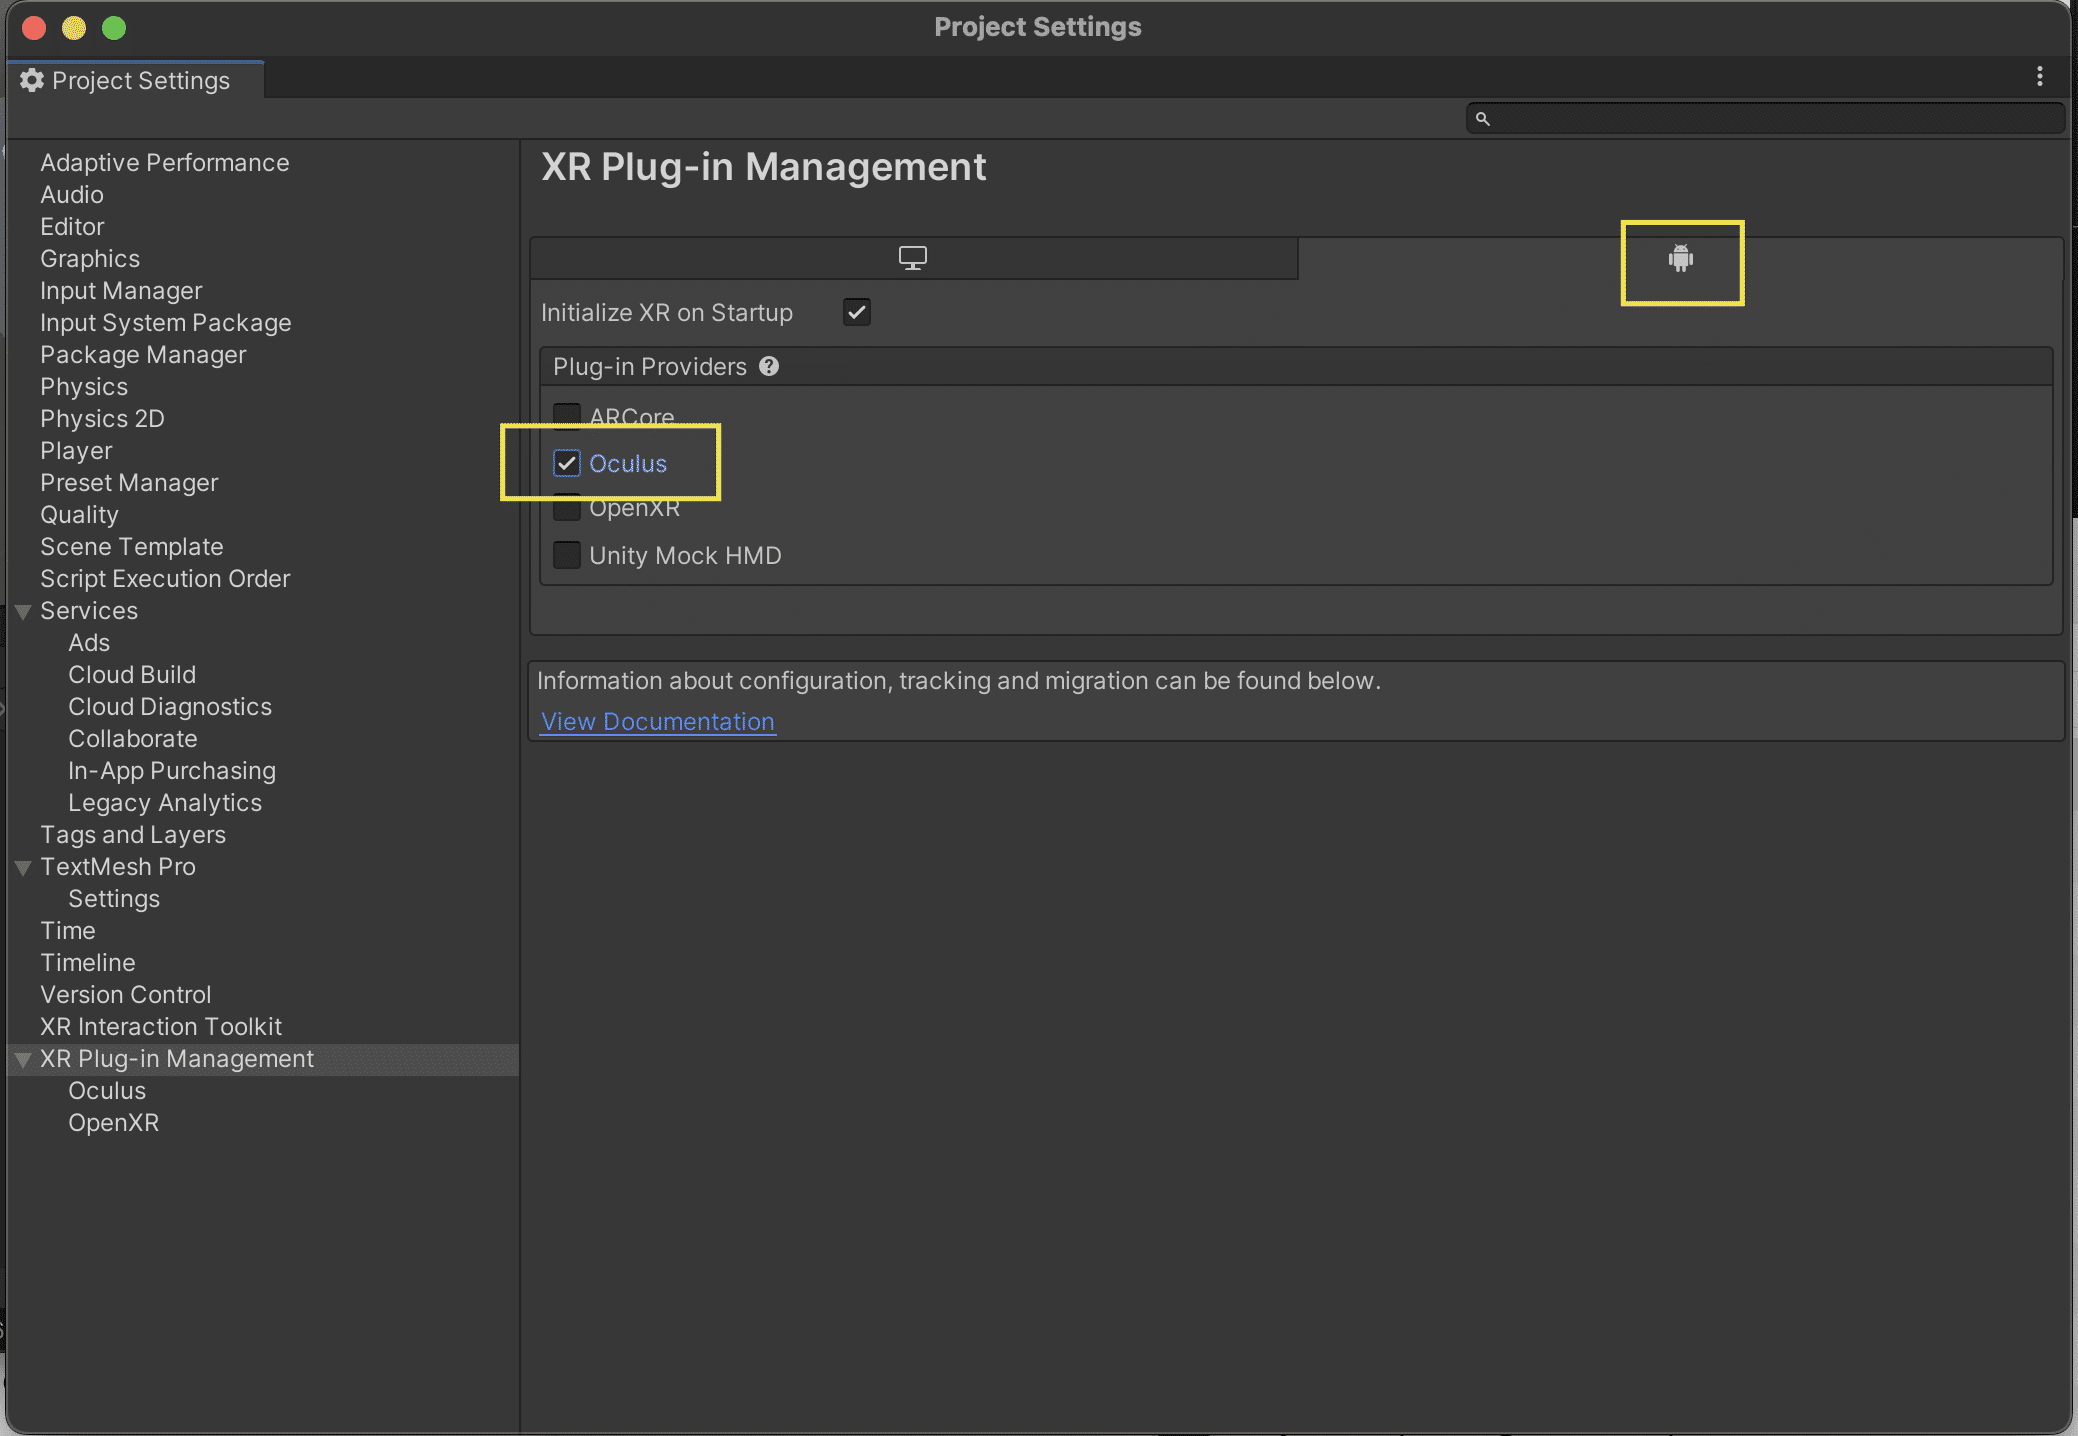
Let’s make sure we have the correct project settings for testing on the Oculus Quest 2
Go to the Edit > Project Settings menu
Under XR Plug-In Management make sure under the Android tab, Oculus is selected
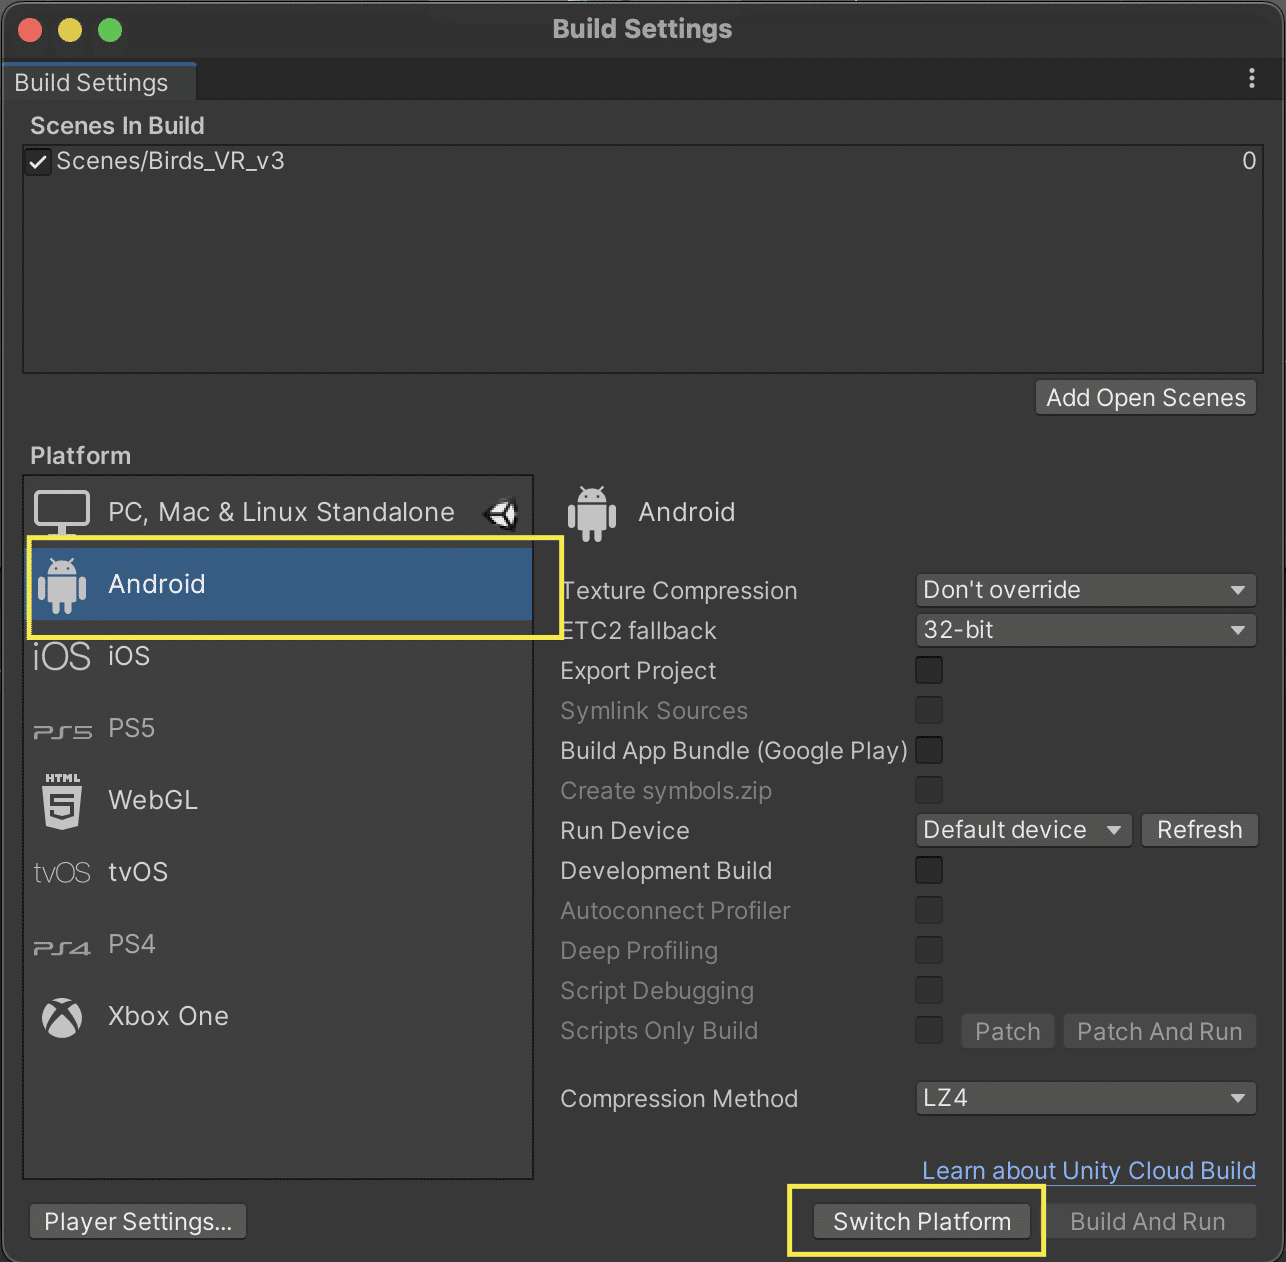
Next we need to make sure we have the correct Build Settings (File > Build Settings)
Make sure Android is selected and click ‘Switch Platform’ …. this may take a few minutes.
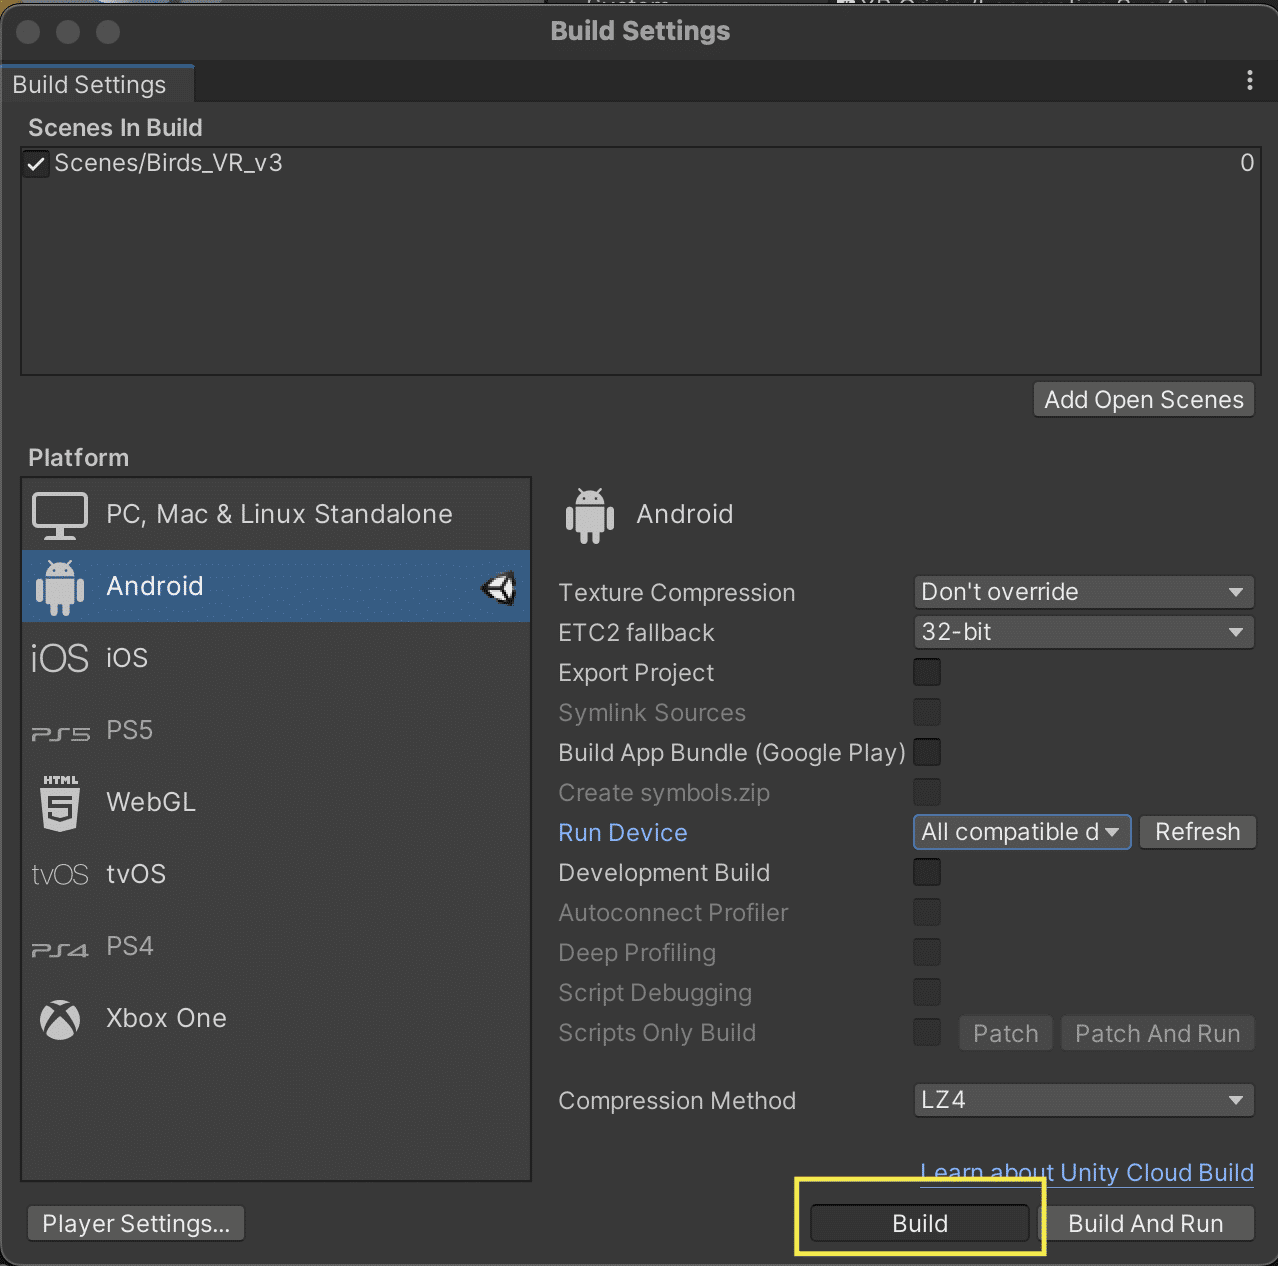
Next click on “Build” …. this make take a few minutes based on your set up. It should ask you where you want to save the .apk file.
When the file has been built, side load it onto the Oculus for testing using the Oculus Developer Hub.
Depending on your setup you could choose Build or Build and Run …. I am on macOS and for my setup I build the .apk and then sideload it by dragging the file and dropping it on the Oculus Developer Hub app and then ‘Launching’ the project.
I hoped this helped if you were having trouble getting your first VR project working …. take a look at the links below if you need more in depth tutorials w/video.
NOTE: If you are having a hard time getting the XRInteraction Toolkit working (ie. teleporting and snapturns in VR are not working) .... take a look at this
Make sure you have the XR Interaction Toolkit installed (check the Window > Package Manager)
Select the XR Default Right Controller, and in the Inspector window click ‘Add to ActionBasedController default’ ….. this will add the input actions so we do not have to do it manually.
Do the same for the XRI Default Left Controller
Next we have to make sure the right and left controller are mapped correctly from the Preset Manager (Edit > Project Settings > Preset Manager)
Make sure to add in ‘Right’ and ‘Left’
Add a new XR Origin to your Hierarchy. When you check the LeftHand Controller and RightHand Controller you should see that they now have the correct reference.